Cricut Removable Wall Decals: Inspiration + Tips & Tricks
The following post contains affiliate links. By clicking on the links you are supporting my site and allowing me to continue to create free content. I promise, I only share products that I use and love! For more information please see my disclosure page.
Let’s get inspired to create with Cricut! I’m not affiliated with Cricut but I want to share some photos of various home decor projects I have completed with my Cricut Joy. So let’s get cutting!
I absolutely love the look of wallpaper but I have no confidence in myself being able to install it without hiccups. Also, nice DIY wallpaper is really expensive it’s basically a massive commitment I’m not here for. So I thought about how I could emulate those gorgeous designs without the commitment of wallpaper. That’s when it clicked, duh use my Cricut with removable vinyl. The removable access allows ease of use, simply peel it off like a sticker and add it to the wall, there’s no need to use transfer tape.
I personally have the Cricut Joy. I think it’s perfect and really convenient if all you see yourself doing is making occasional stickers or labels. I used to have an older Cricut and I hated how large and cumbersome it was to use which meant I never used it. Not to mention the annoying and expensive, mats.

I am completely OBSESSED with the new “smart vinyl” concept. It makes it so quick and easy to create projects. If you have one already I recommend checking out the vinyl on Amazon, I have found incredible deals on the smart vinyl compared to the stores. Also, don’t pay full price for the machine itself, they are constantly going on sale. I think I got mine $40 below retail at Target. I also saw a massive bundle at Costco recently that I can only imagine is an incredible deal!
Tips & Tricks for Making Wall Decals with your Cricut:
- Always use removable vinyl, just trust me. It’s very easy to use! You can easily reposition it and when you are ready to move on, it comes off super clean and easy, like it was never even there!
- Don’t install it in front of your little ones, they will immediately think it’s a game and try to take them off at every opportunity. Instead, allow it to be a big surprise/reveal, think HGTV style.
- Design. Choose a design with large bold lines. If you do something with lots of cuts and tiny details it’ll be much harder to peel off and position on your wall without transfer tape. I personally hate transfer tape and avoid use as much as possible (lint roller sheets make a great affordable alternative). Also, make sure your design is large enough to make the right impact, don’t be afraid to cut it with cardstock first and tape it on the wall. Nothing puts more of a damper on a DIY than wasted materials and let’s face it vinyl is not cheap.
- Measure, Measure, Measure. When using pricey supplies like vinyl, it’s important to ensure your sizing is perfect before cutting. I have learned the hard way many times and it always ends with being dissatisfied. For big projects, it’s 100% worth it to do a test cut on cardstock and then tape it up on your wall, step back and ensure you like it.
- Another one with kids, the placement. I try to start my mural higher up and out of reach if possible, like above a dresser.
- Make extras. For my wave mural, I went ahead and made an extra 6 or so waves because as a mom, I just know they’re going to be peeled off at some point. Knowing my kids they will probably decide to do so right before we have company over. With those extras ready to go, I’ll quickly turn a stressful audible into a moment of accomplishment.
- Use a credit card. Let your project sit for a day or so and then run over everything with a credit card to smooth down any spots that uplifted or tiny bumps.
- Sorry but no wall texture. I understand those 1950s plaster walls are terrible, our previous home had them in every room. Depending on the amount of “roughness” this removable vinyl is not going to work. You can try the permanent version but it’s not a sure success and it might mess up your paint. A great alternative would be to adhere your vinyl to something else like you could do a really cool scene with vinyl on a chalk or dry-erase board with a nice frame. Hobby Lobby is a great place for things like that of all sizes. Then you can simply hang it on the wall like normal.
- Start in the least visible spots, like the bottom or upper corner. Don’t start at your eye level because let’s face it, your first few decals might not be Pinterest ready but by the time you get to the end, you’ll have the hang enough to make the decals at your vision level perfect.
- Finally, just relax and have fun! Don’t stress out messing up because this vinyl is extremely forgiving!
Enough chit-chat, I’m not here to sell you a Cricut but rather to inspire you to create a space that you love!
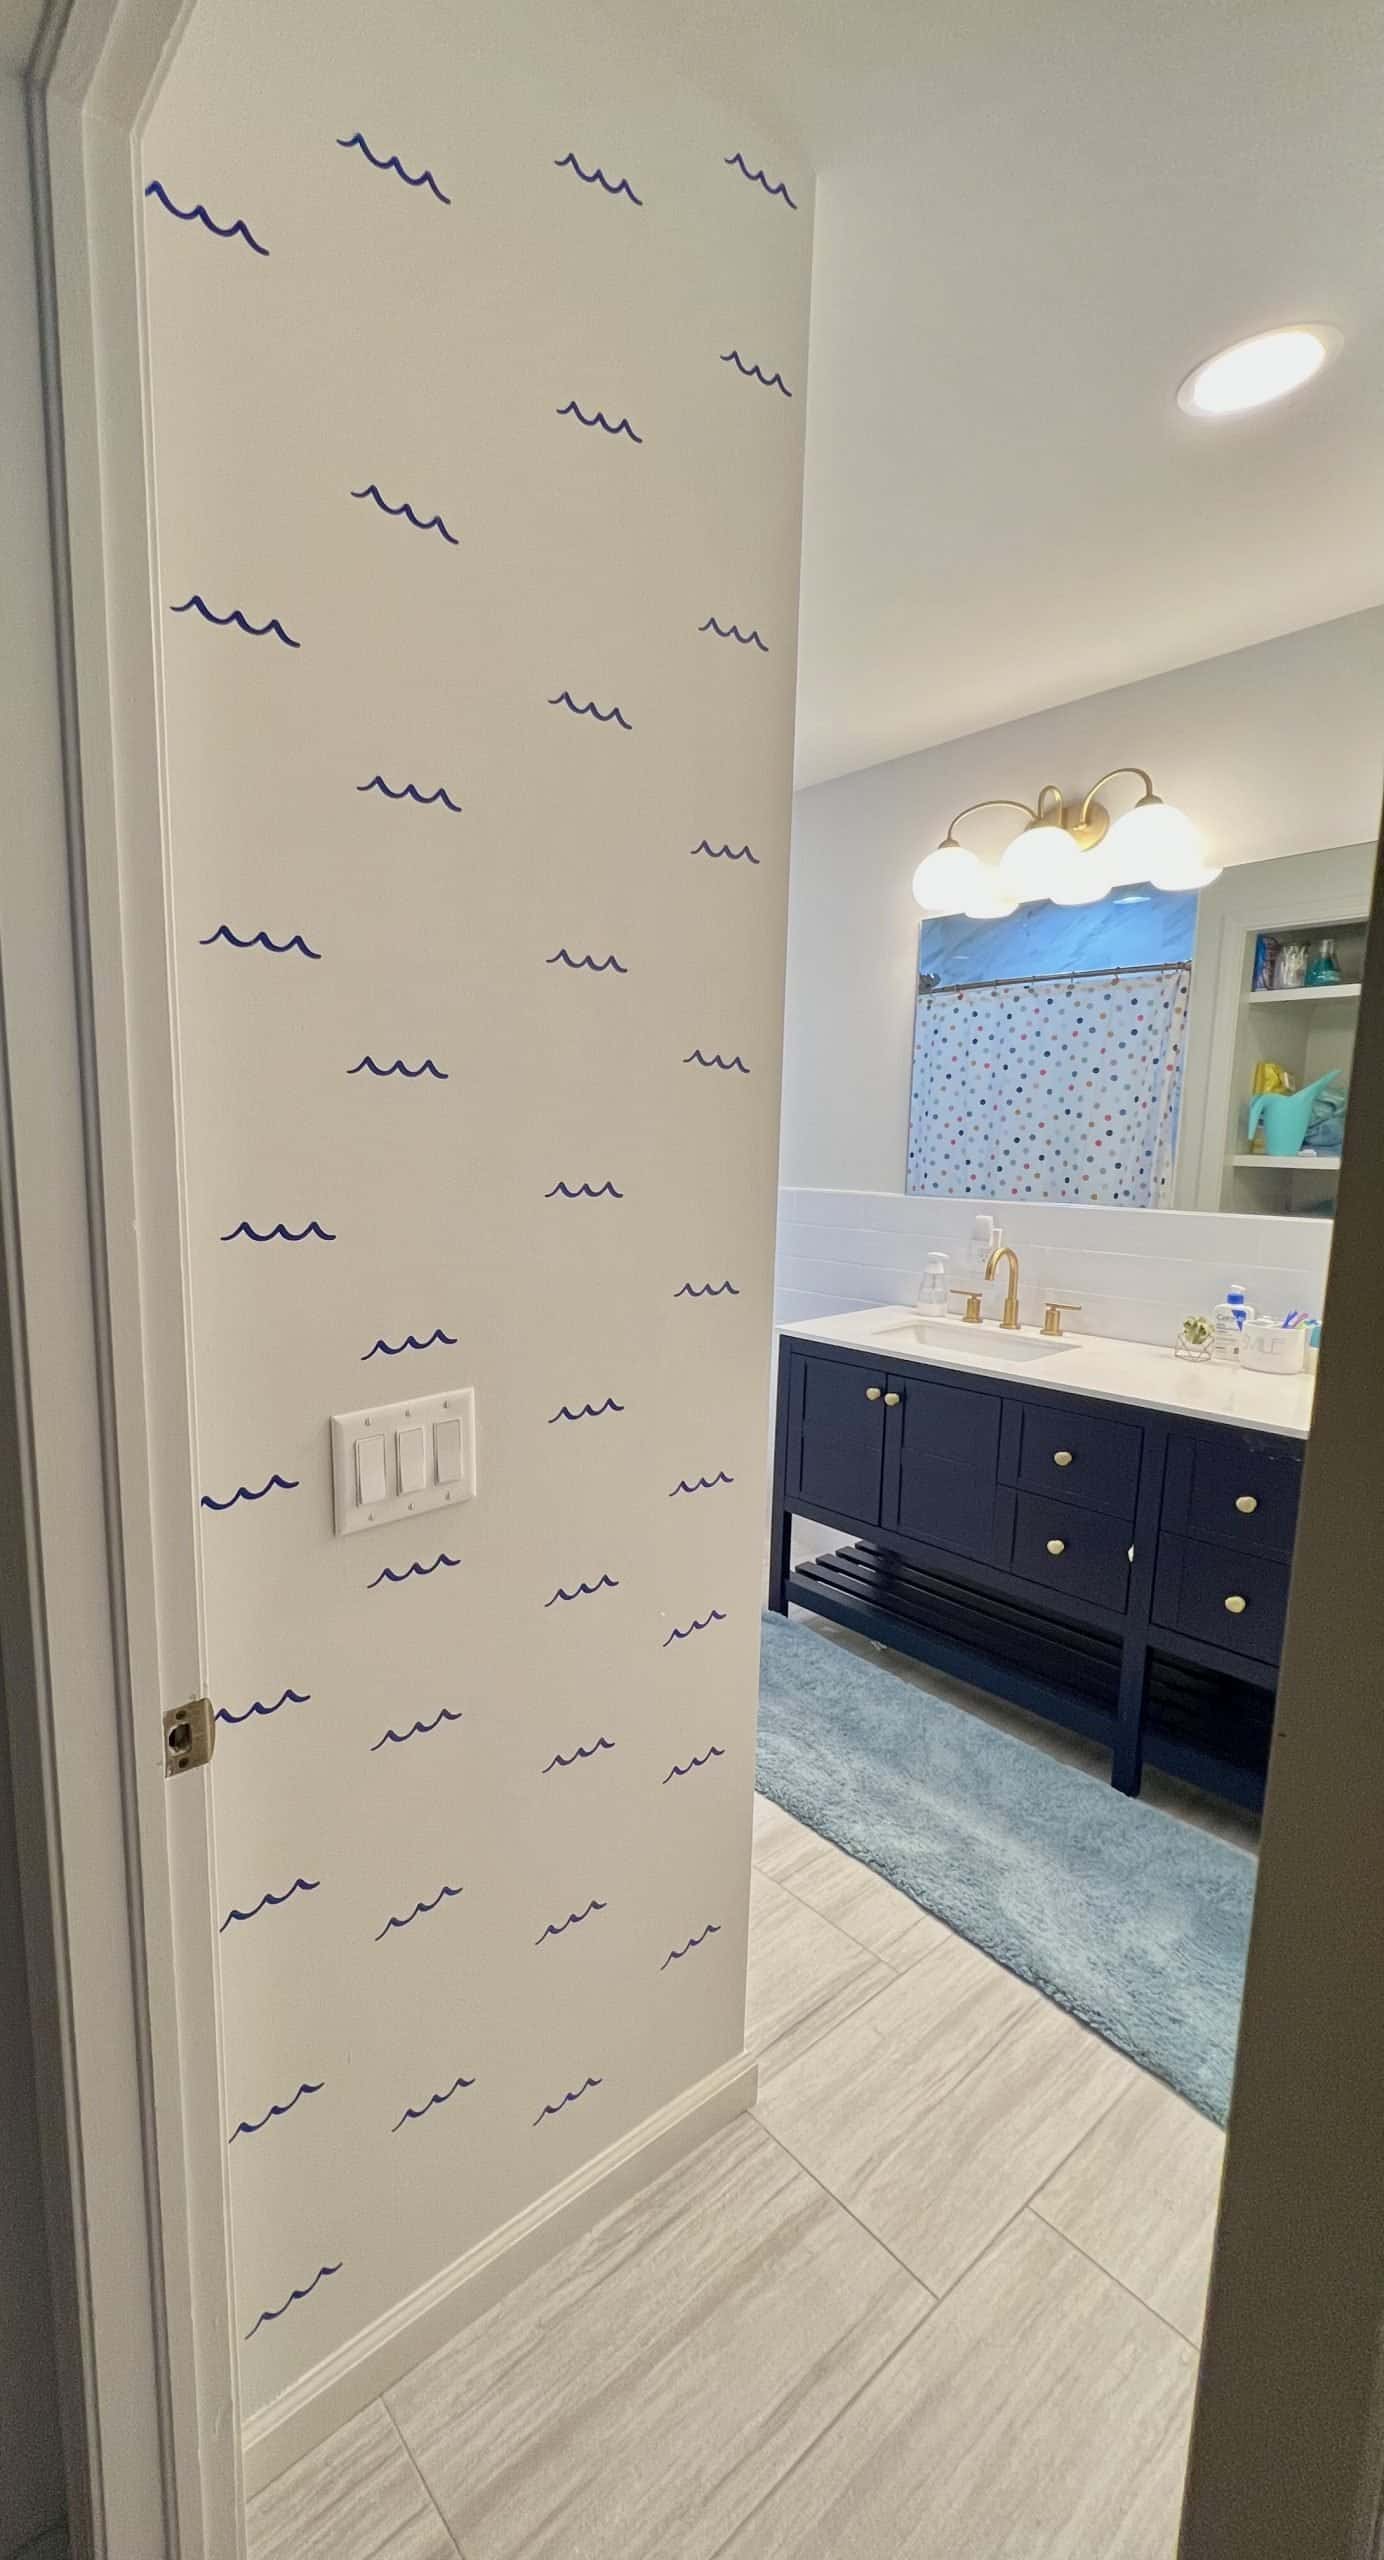
Kid’s Bathroom: Wave Wall:
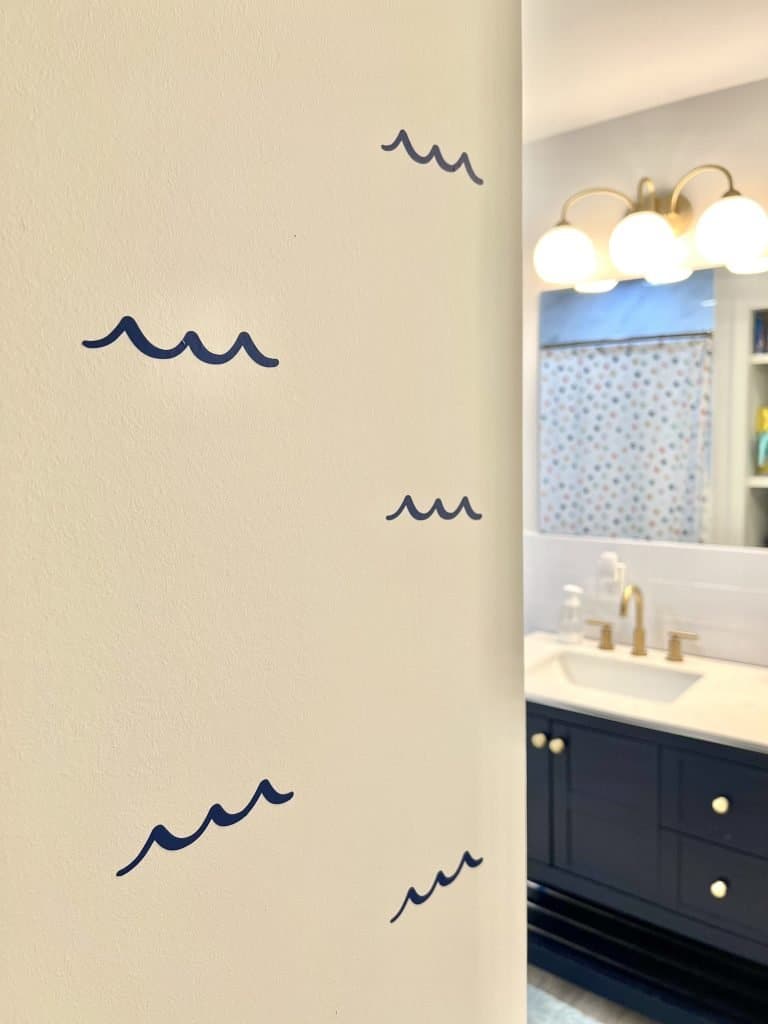
This wall was directly inspired by a gorgeous wallpaper I found online. It was really expensive and the wall I wanted it for is not exactly perfect so I didn’t want wall blemishes to compromise a high-end wallpaper. By doing stickers, it calls no attention to the blemishes and it’s all removable! I am obsessed with the wall I chose because it’s minimal and you can easily see it from the hallway so when we have guests over for the first time it’s incredibly easy for them to figure out that’s the bathroom.
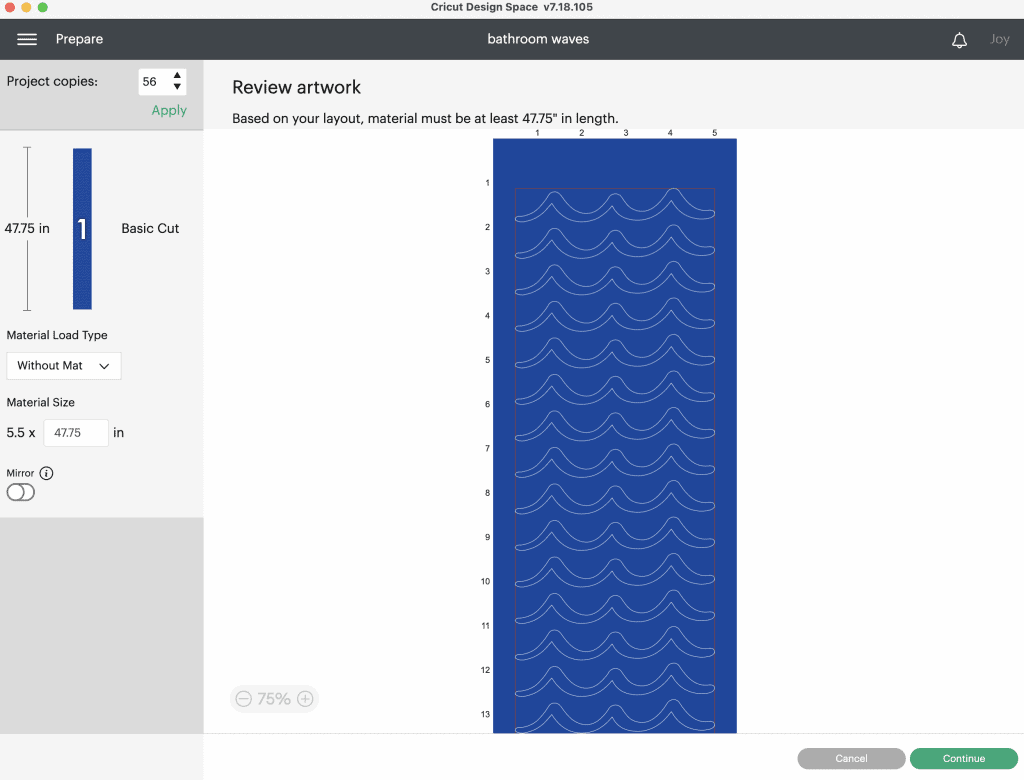
I used 1 roll of the Vivid Blue Removable Vinyl (pictured above) with a wave from Design Space ( Waves (#MB534002) ). I made each wave the maximum width for my vinyl (4.5″) and added as many as possible to use the entire 48″ long roll of vinyl. I ended up getting 56 waves to fit leaving me with about 8 waves extra. I kept the extras “in case”, let’s be real when my kids decide to peel them off. This project only costs a few dollars in the cost of vinyl but looks like a $200 wallpaper feature.
I am actually contemplating painting over the stickers with light blue paint and then peeling off the stickers to reveal a white wave. But that will have to wait for another day.
Also, feel free to customize. the look by adding more waves. My personal taste is less is best, so I didn’t want to make it too busy but you do what you want in your home! I personally think of a wave layout/pattern like this premade wallpaper.
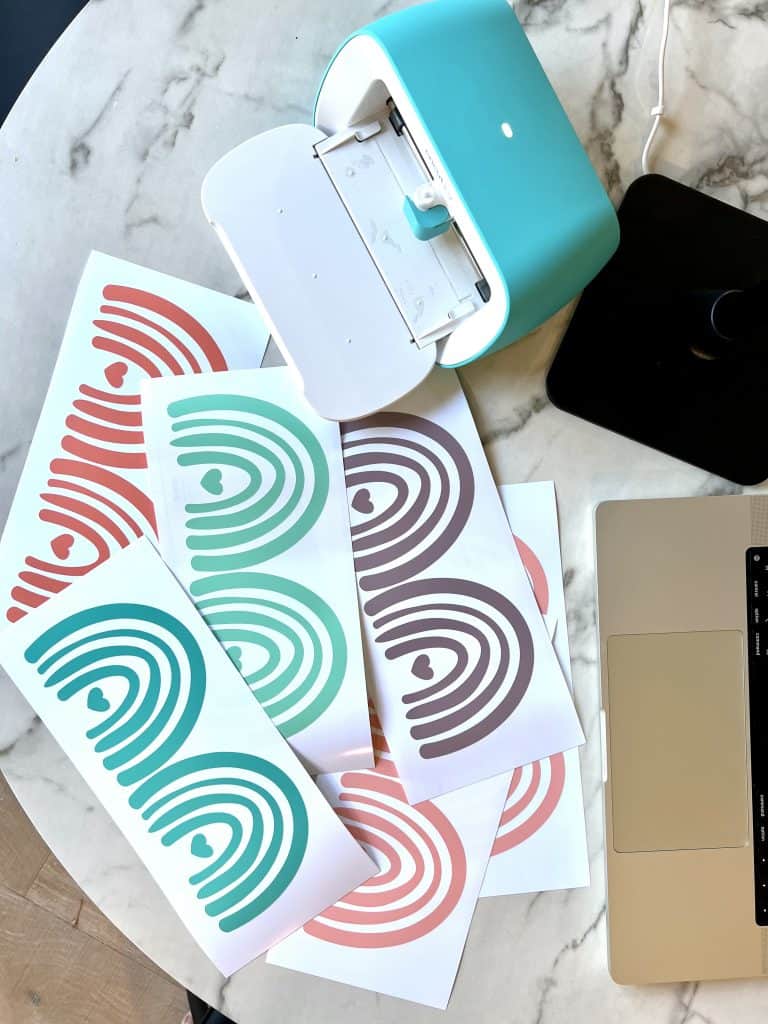
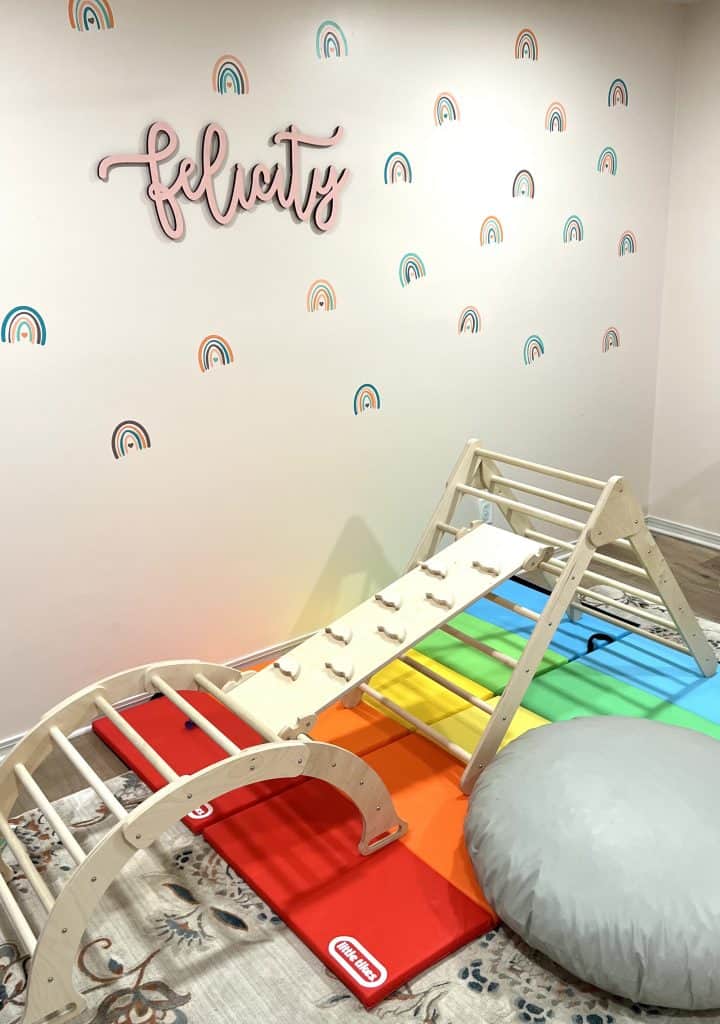
Rainbow Wall:
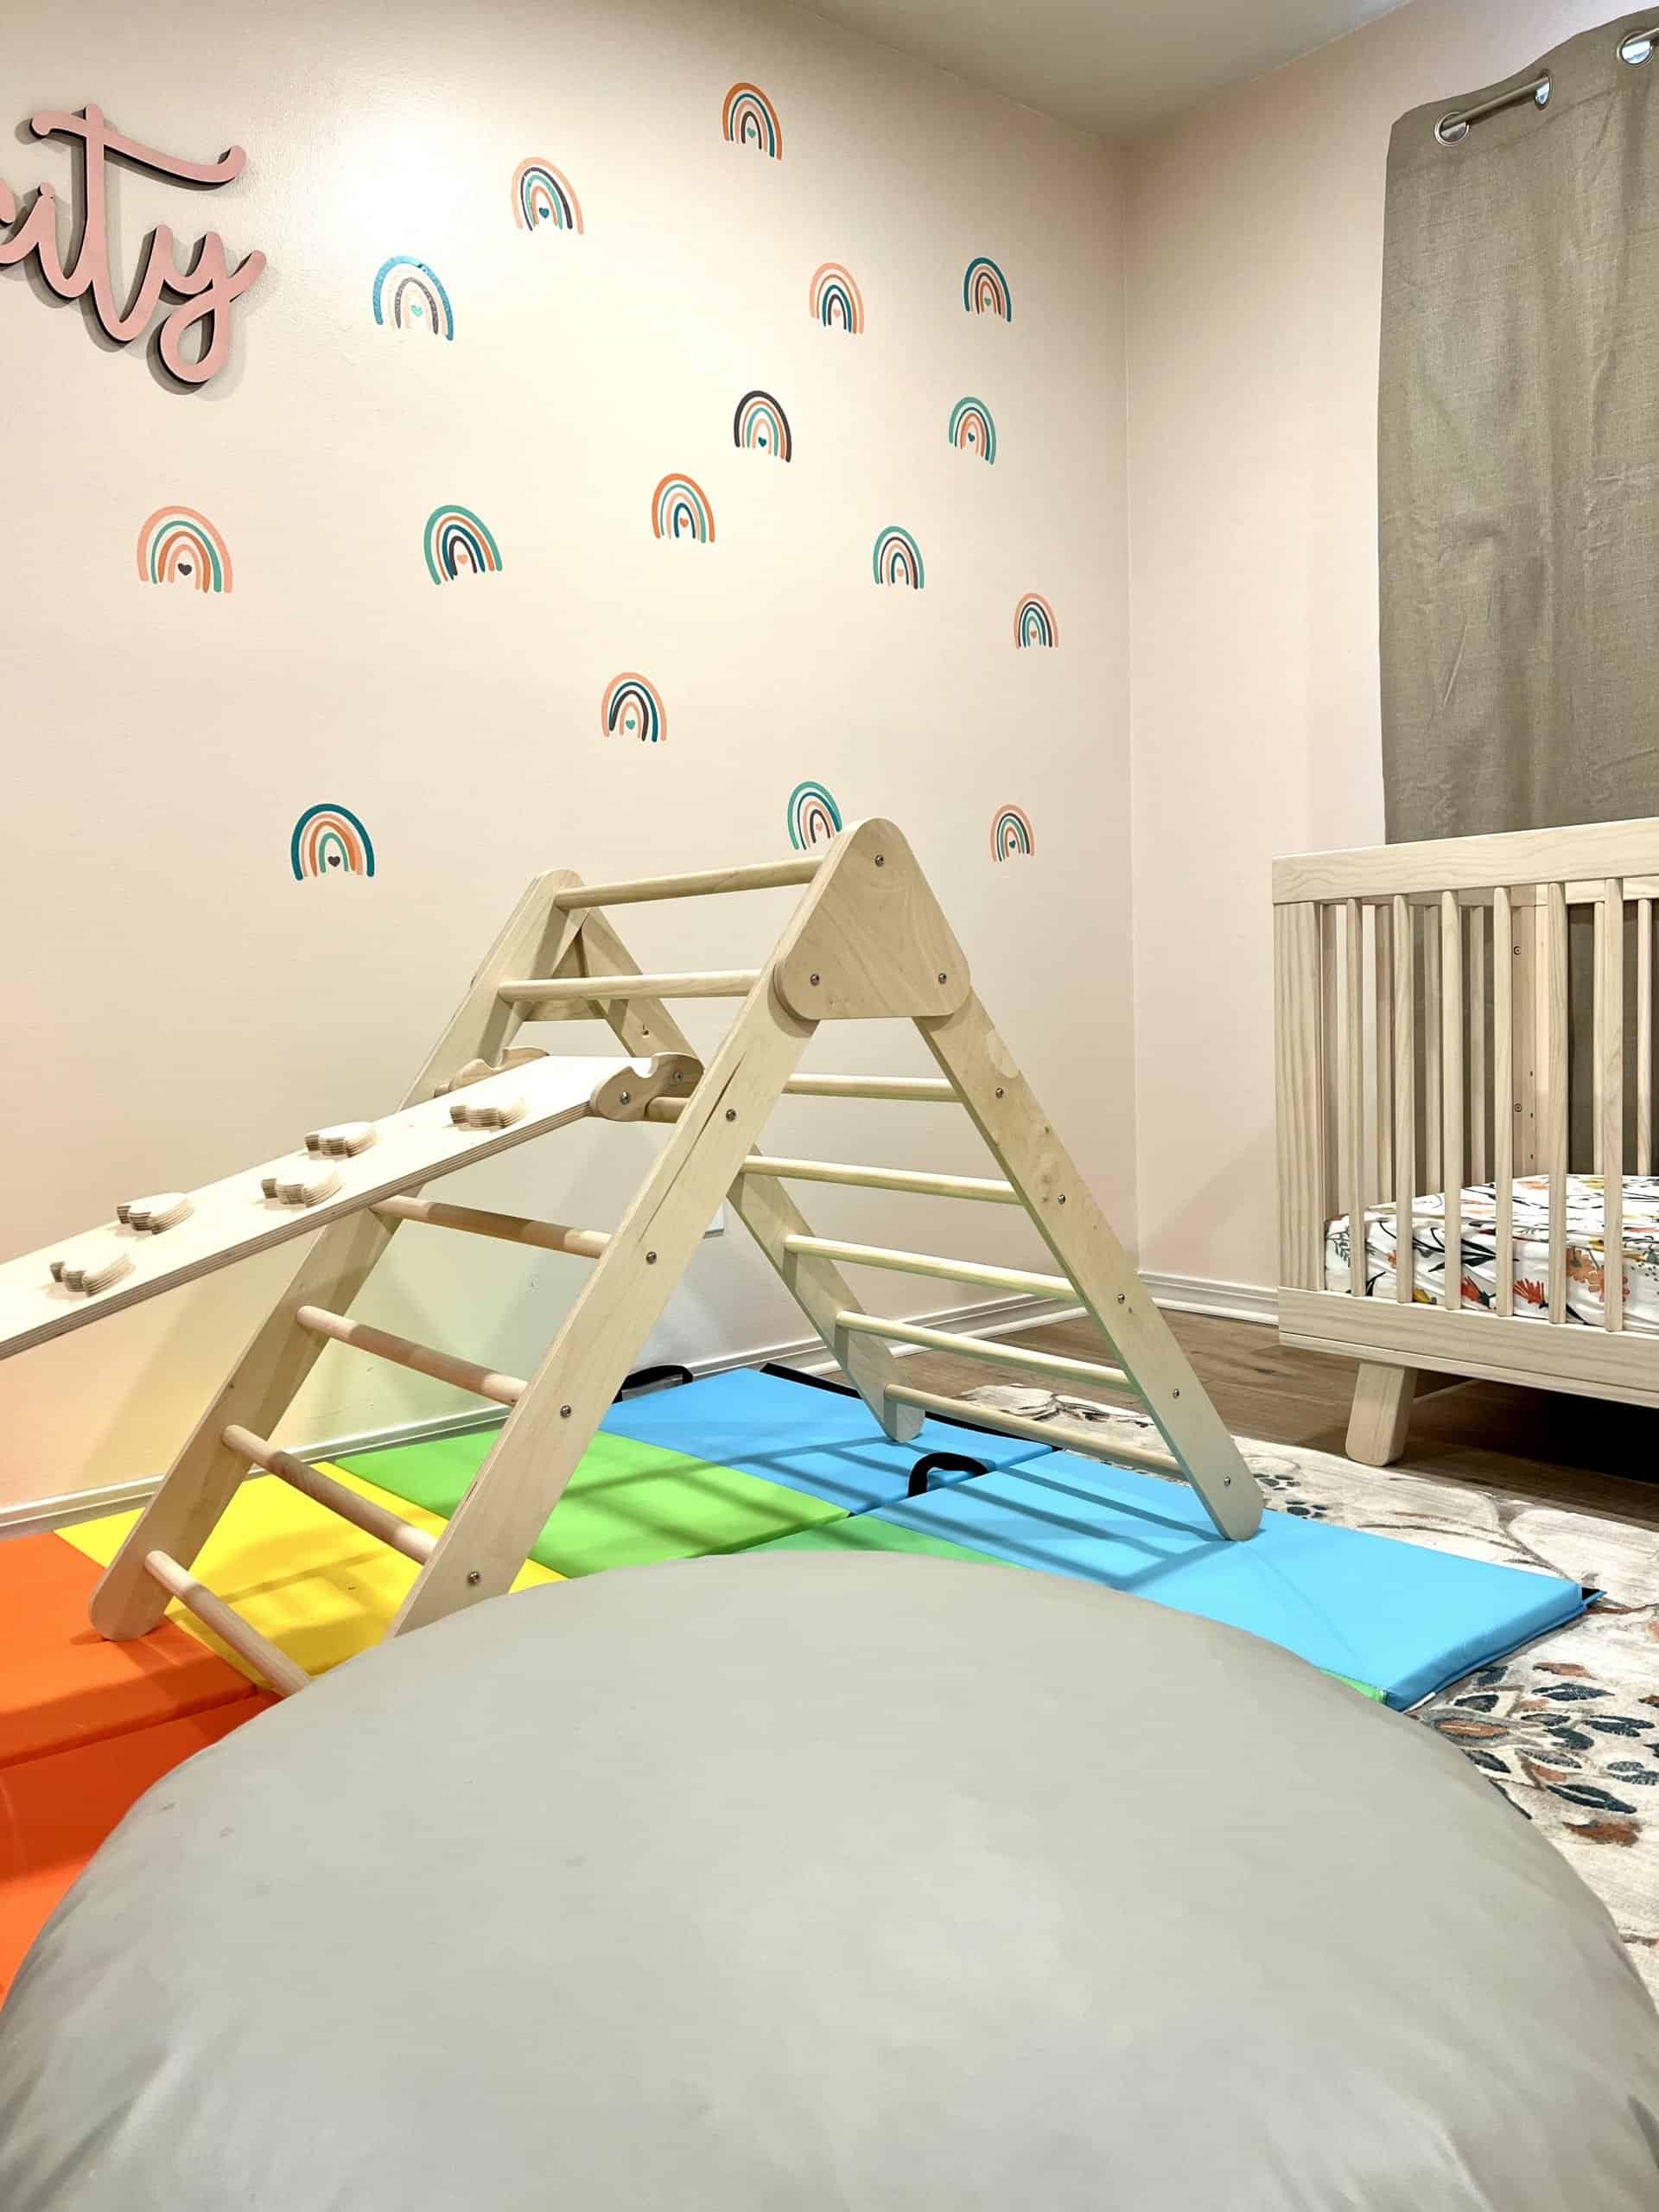
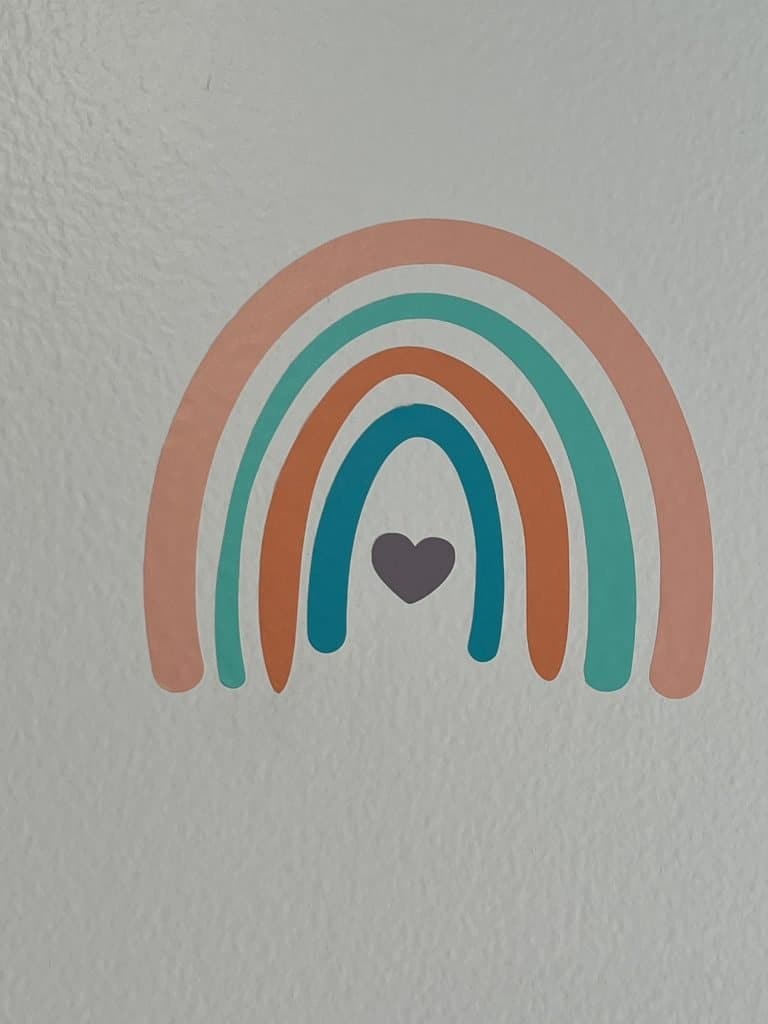
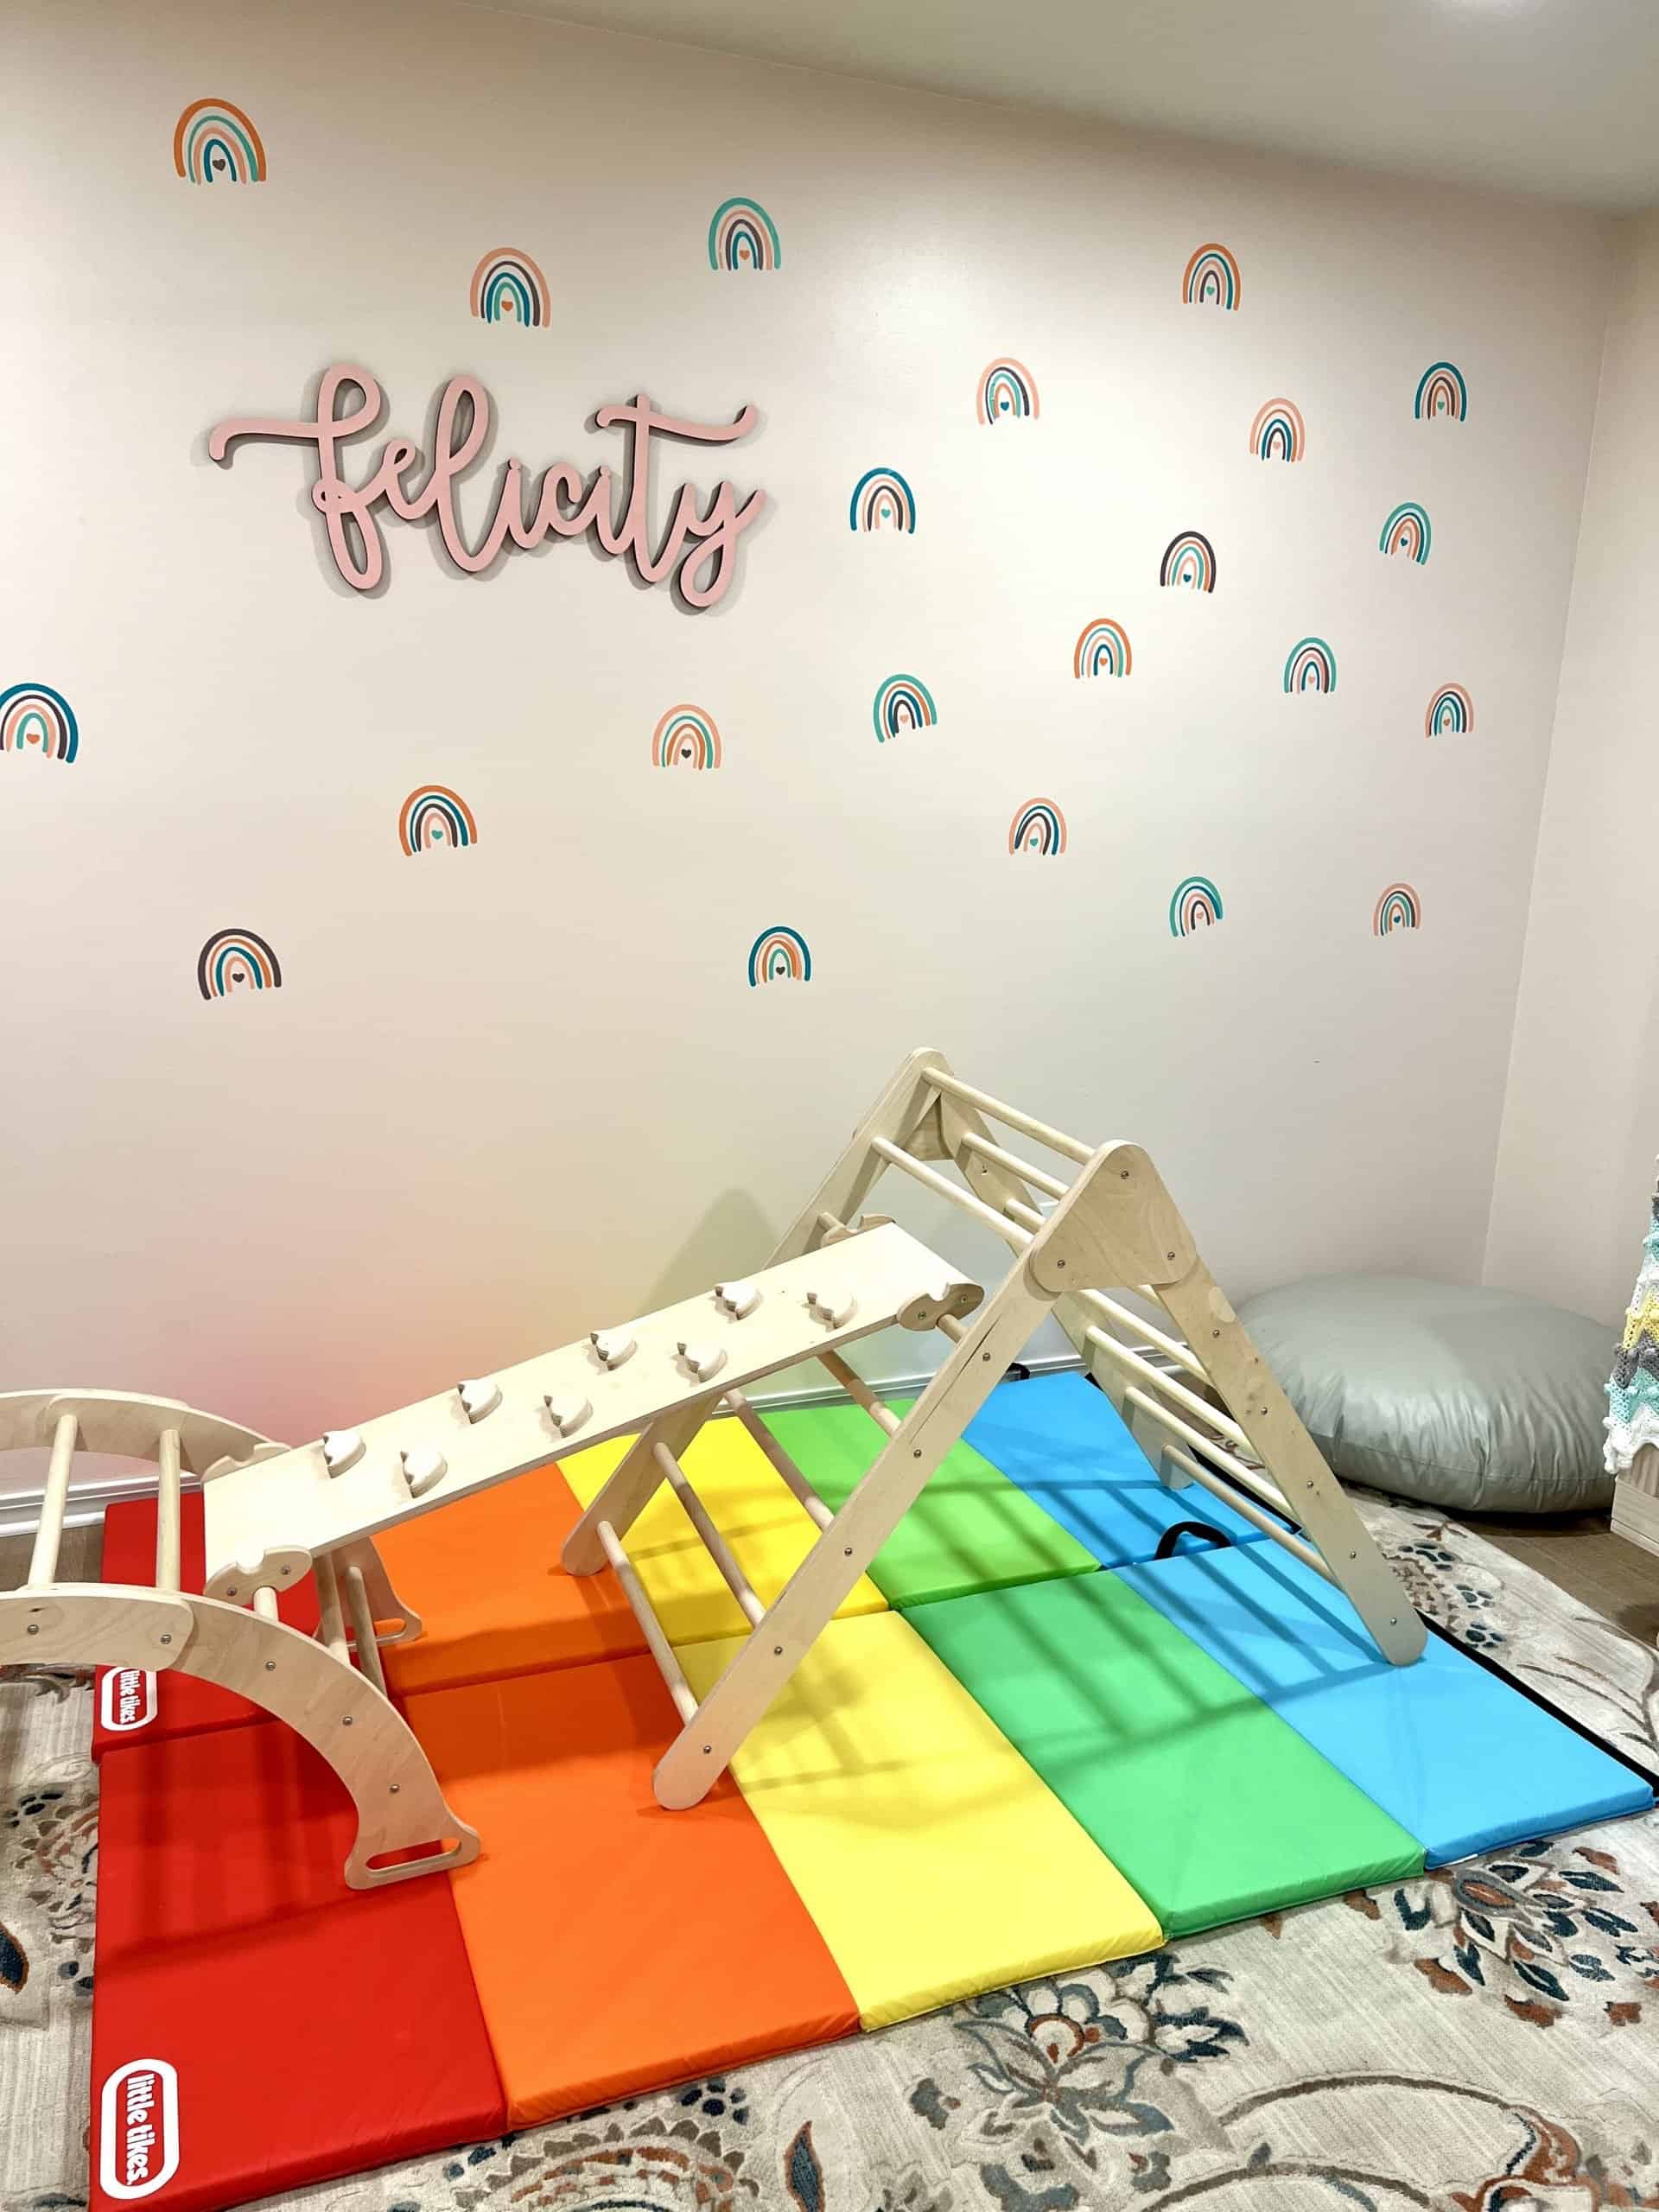
This one was really fun! I found a sampler pack with 5 colors that I was absolutely obsessed with. I then bought an inexpensive rainbow file in Design Space that had 5 layers. The layers were initially all different colors so I merged them and made it all one. I then sized the rainbow so I could fit 2 rainbows on each sheet (5.1″ wide x 4.37″ tall) and cut all 5 sheets. Next was the fun part, where I layered the rainbows so each part was a different color. To layer, I simply started with the largest, outerband, and worked down to the center heart. This created a custom cohesive look since the rainbows are not all the same color orders. I chose to install it on a massive wall in my daughter’s room so I ended up using 3 packs of the Hydrangea Sampler which made 30 rainbows total. I placed in the center of the wall her Name cutout from her nursery and it instantly looked high-end.

Don’t worry about little mistakes, like overlapping bands or unevenness. This vinyl is incredibly easy to remove and restick, even weeks later. And honestly, I personally like that homemade touch of little mistakes. It gives character to the project and adds to the whimsicle child like aesthics. I promise that probably 1/4 of mine have little errors.
I did purchase the rainbow design from Design Space, it was really inexpensive and I love supporting independent designers! If you would like to use the same one it was called Rainbow ( #M3C7559C1 ) by Whispy Willow Designs. ETSY has tons of SVG files as well and is another great way to support artistic entrepreneurs like me!
It’s really hard to capture but the paint color looks phenomenal with this color selection. If you are in the market for a soft yet sophisticated shade of pink that will never be overbearing then I highly recommend Sherwin Williams Intimate White (SW 6322). It’s such a faint and subtle shade that will look great from nursery to teen years. My husband was highly skeptical of it when I picked the color but he even agrees it looks great!
Toddler Boy’s Room:
For my son’s room, I went completely with the theme Pixar. The really cool thing about Cricut is all the licensed stuff they have available in Design Space. As for the Disney items, don’t be discouraged if the only Woody you find has a bunch of other stuff going on. I like to buy the image then separate all the layers, hide what I don’t want, and then I am left with the exact character I was looking for. That way, I feel good that I legally bought rights from Disney for the project without uploading an illegal image which can actually get your account frozen by Cricut. Short story long, my account was flagged years ago for uploading a college football logo.
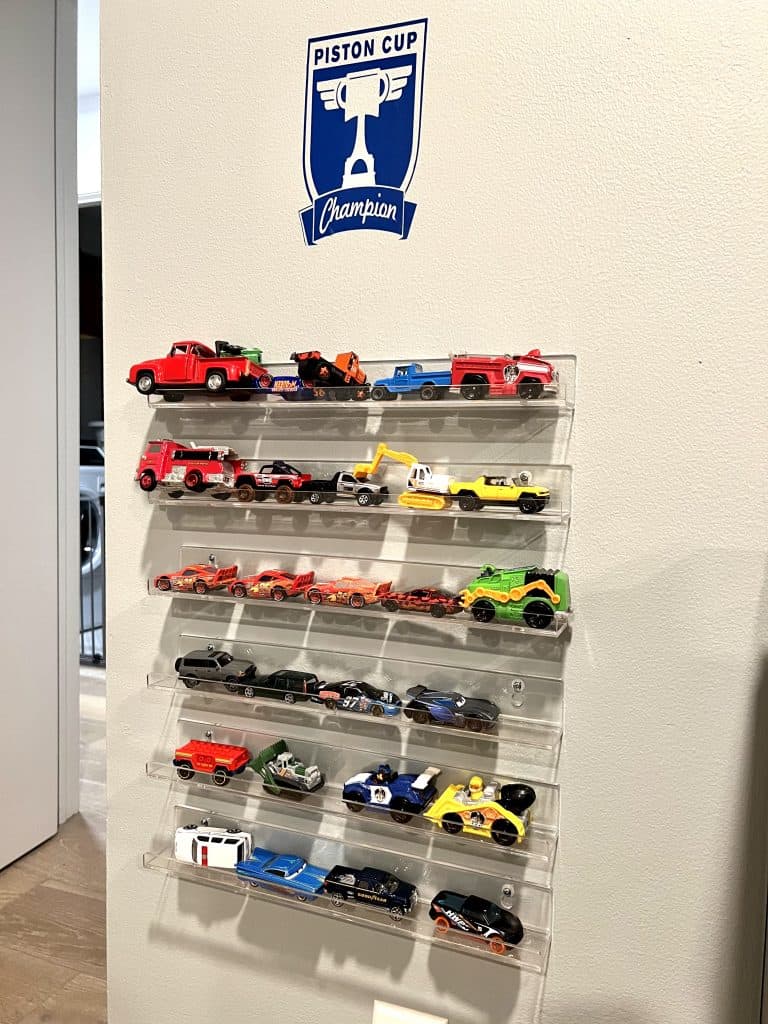
Every parent who has a bunch of Hot Wheels laying around understands the frustration of storage options. I decided to get the acrylic clear shelves on Amazon (pictured below) for little toy cars. Then I added this Piston Cup Champion decal, from Design Space, ( Cars 3 Legends – Piston Cup Icon #M282F759 ) above and my son immediately made the connection to the movie Cars.

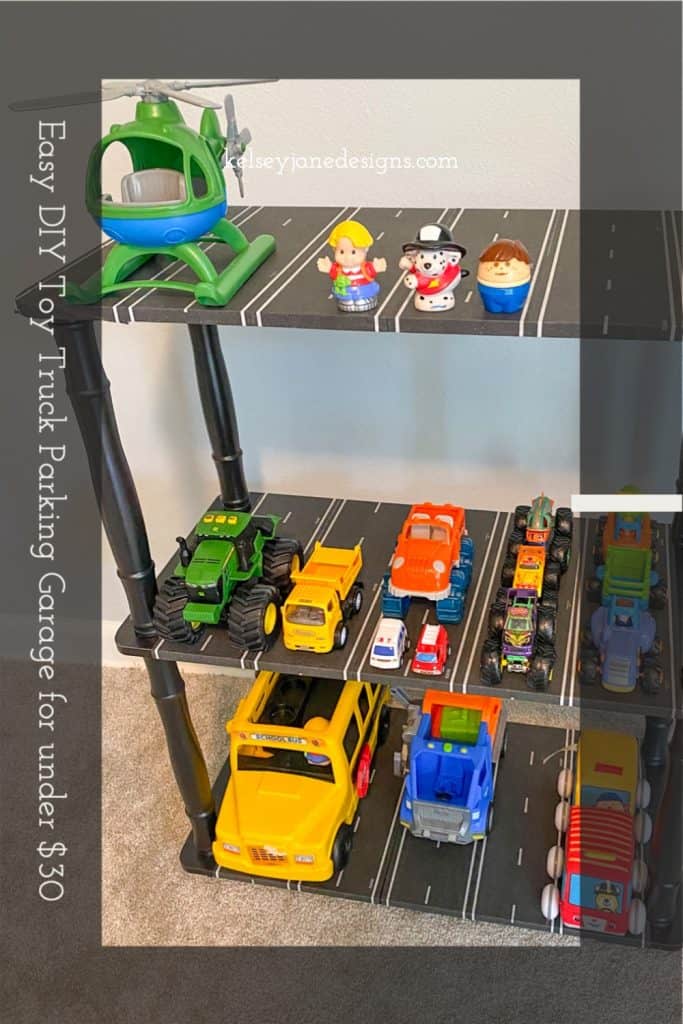
If you want to see a storage solution for larger toy cars, check out this DIY I made.