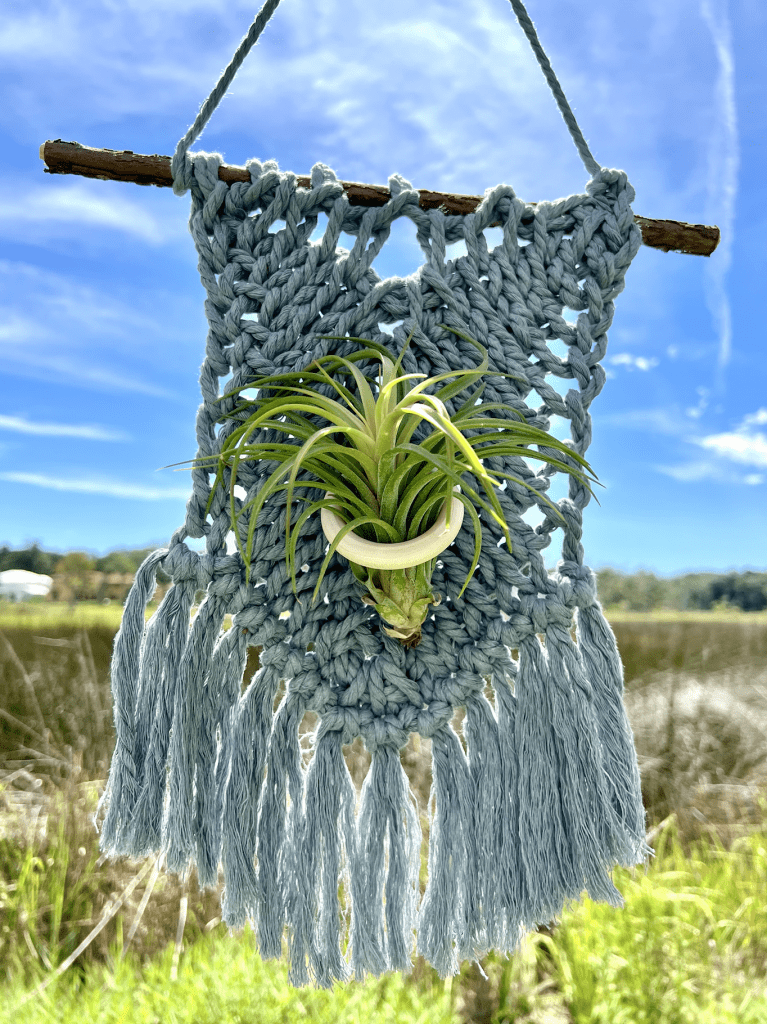
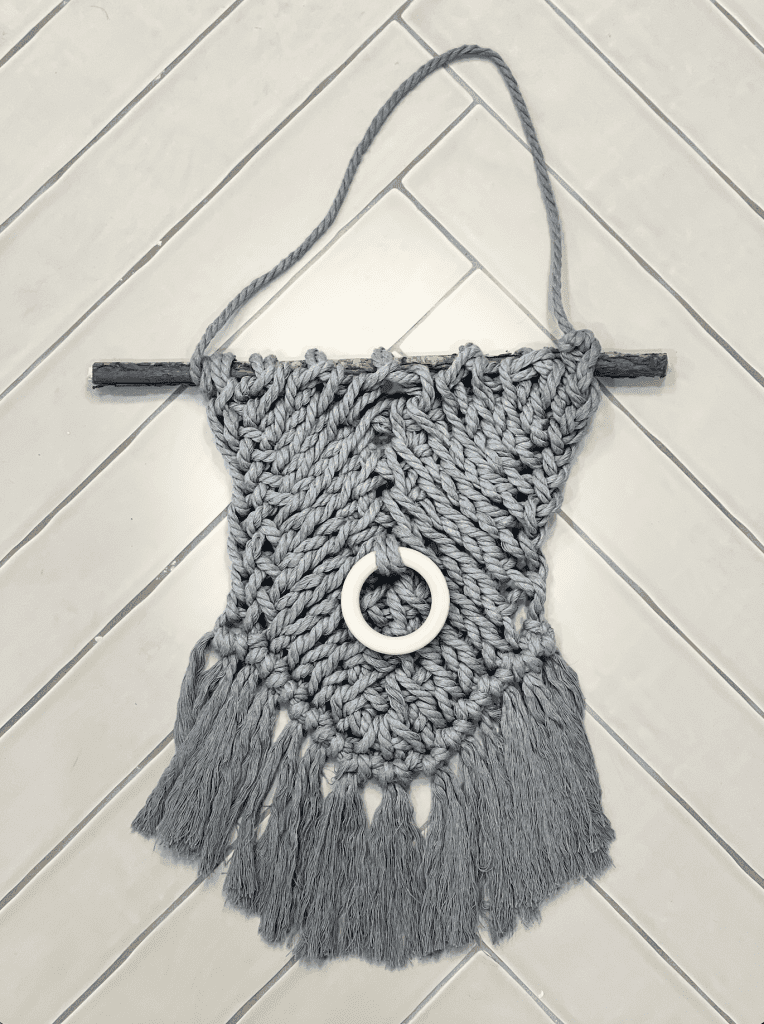
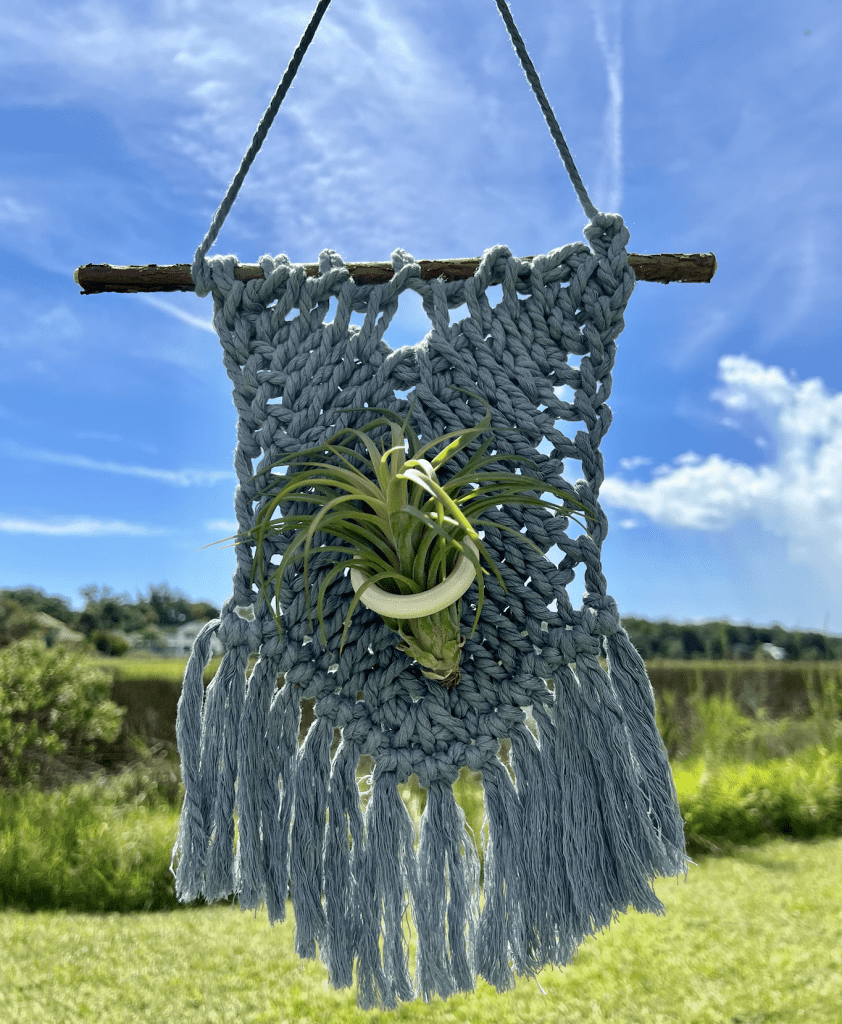
How to Tunisian Crochet an Air Plant Holder using Macrame Cord
The following post contains affiliate links. By clicking on the links you are supporting my site and allowing me to continue to create free content. I promise, I only share products that I use and love! For more information please see my disclosure page.
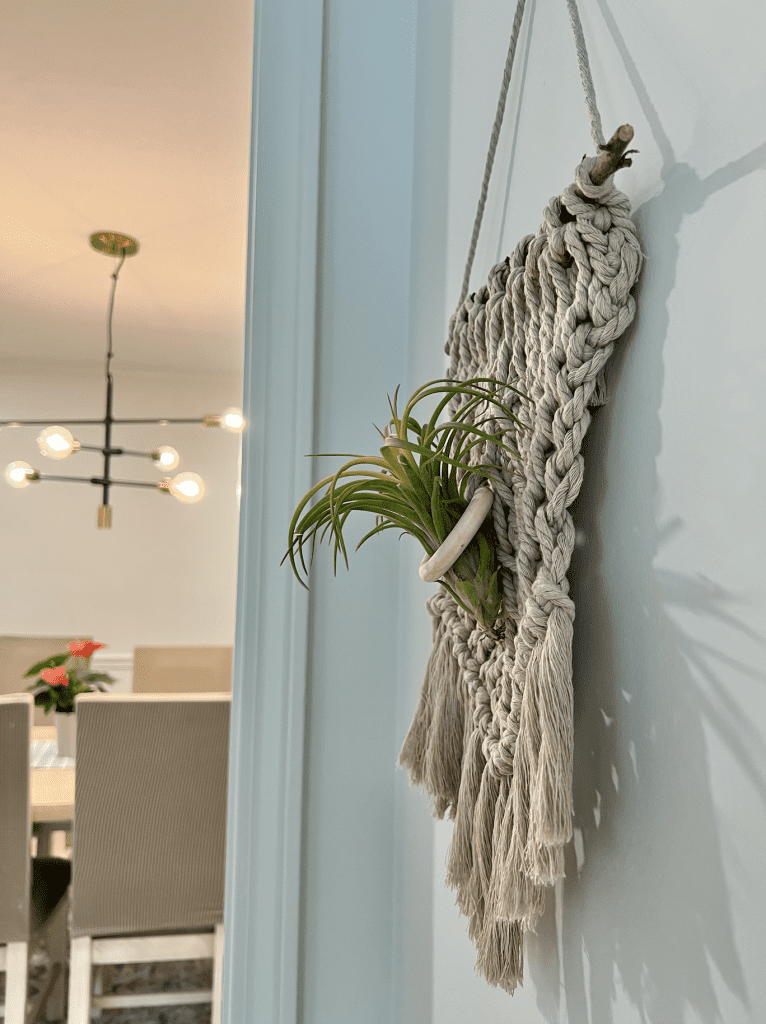
How to quickly make this air plant holder using Tunisian Crochet and macrame cord.
The following post contains affiliate links. By clicking on the links you are supporting my site at no cost to you and allowing me to continue to create free content. I promise, I only share products that I use and love! For more information please see my disclosure page.
I love the concept of selling handmade items! Feel free to sell your finished project, I kindly ask that you link back to this pattern so other makers can find it.
Where to buy air plants?
Whether you are looking to buy 2 or 100 air plants, I highly recommend checking out Air Plant Supply Co. They are actually local to my area but have a highly successful website and ETSY shop. I ordered a variety of plants and they shipped incredibly fast and were impressively large. They also have a philanthropy side by donating $1 from every order to Pencils of Promise.
Check them out and support small business!
Inspiration + Design
What’s not to love about air plants. They are incredibly easy to care for and are an easy way to add some green to your home. The thing I don’t like is how expensive plant wall hangings can get online. So instead of shelling out a pretty penny for something online I decided to design something myself that fit my unique style. I had an exact wall in mind for it and I got to stitching.
After trying out a few swatches with traditional crochet stitches, I couldn’t resist trying the classic look of Tunisian Knit Stitches.
Purchase the ad-free PDF of the pattern on ETSY.
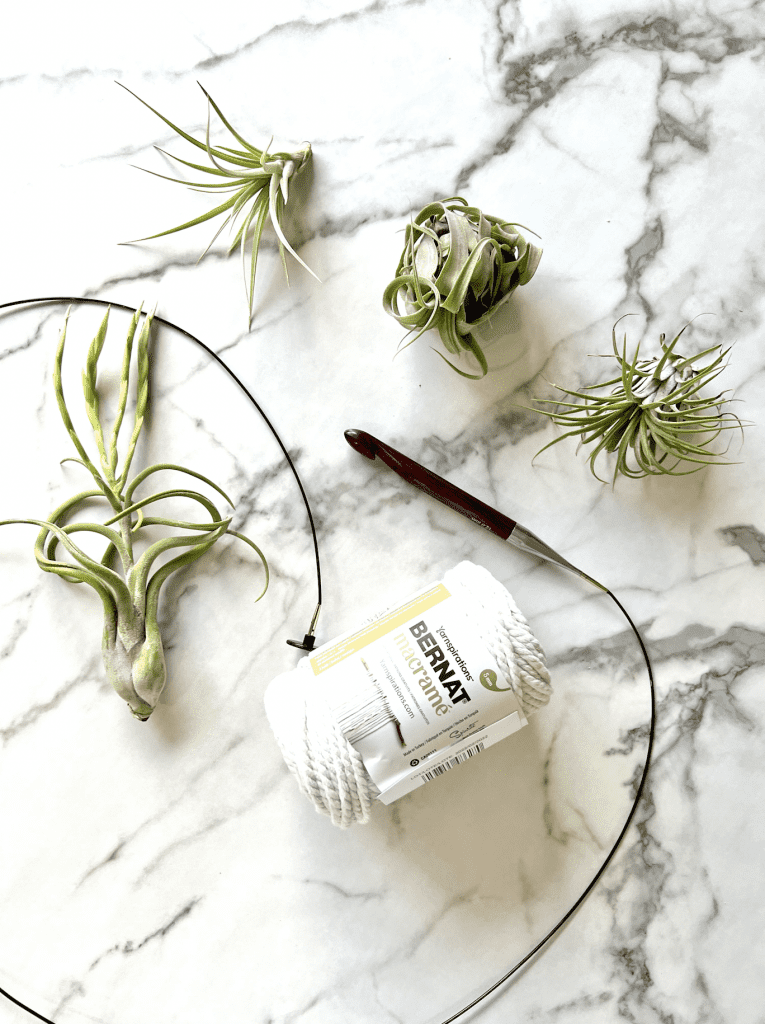
Supplies:
- 12mm Tunisian Crochet hook
- 5mm Macrame Cord I’m using Bernat Macrame
- A wooden ring, appropriate to the size of you air plant (I’m using a 2” ring)
- Scissors
- Tape Measure (for fringe)
- 11” stick or dowel rod
Abbreviations:
- Chain (ch)
- Forward Pass (FwP)
- Make 1 (M1)
- Return Pass (RetP)
- Tunisian Knit Stitch (tks)
- Tunisian Simple Stitch 3 Together (tss3tog)
Pattern Notes:
Perfect DIY home decor for the tillandsia air plant lover. Works up very quickly making it perfect for last minute gifting or for craft markets. Feel free to sell your finished product I just kindly ask that you link back to my blog or ETSY listing so other makers can find the pattern! @kelseyjanedesigns on Instagram
Where to get air plants? I highly recommend Air Plant Supply Co. Excellent company, fast shipping and healthy plants! https://www.airplantsupplyco.com
Video Tutorial:
I made a helpful YouTube tutorial for how to make this wall hanging from start to finish.
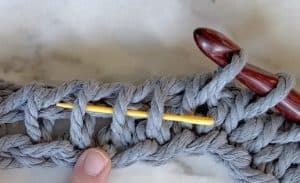
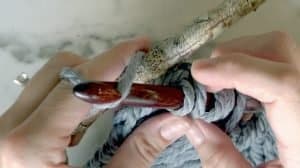
Tunisian Crochet Basics:
Every row in Tunisian crochet is worked in 2 steps: The Forward Pass (FwP): working loops onto your hook and the Return Pass (RetP): working loops off your hook.
Standard Return Pass: YO, pull through 1 loop (chaining 1), *YO, pull through 2 loops* repeat until 1 loop remains on hook.
The Return Pass will be exactly the same for each row except where noted, for attaching the ring and the rod.
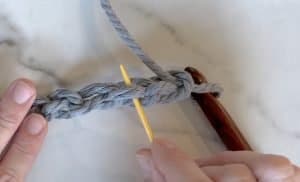
Special Stitches & Photos:
Back Bump Stitch:
Turn your chain upside down and draw up your loop through the bottom/back single bump.
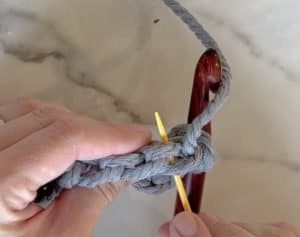
Make 1 (M1) / Increase:
This is used for increasing number of stitches, to make up for the tss3tog. You will Make 1 at the beginning and end of each row. Insert hook under top vertical bars (where you would do a normal crochet stitch), yo and draw up a loop. Continue on with the next stitch.
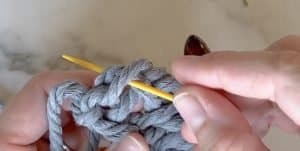
Tunisian Simple Stitch 3 Together (tss3tog):
This decreasing stitch is worked in the very middle of each row to create the V or Wave shape.
Insert hook under next 3 vertical bars, yarn over and draw up a loop. Turning three stitches into one.
Final Stitch of Each Row:
This technique gives makes your edge nice and clean. Turn your work to the side and insert hook under the two vertical side bars, yo draw up a loop.
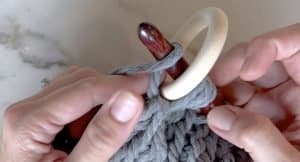
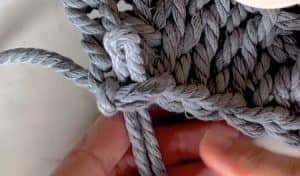
Attaching the Ring:
Attached during the Return Pass (RetP) of Row 5 above the tss3tog.
Insert hook through the center of the ring, yarn over and draw through the next two loops on your hook, as usual.
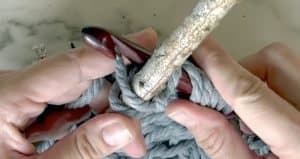
Attaching the Rod:
Completed during the RetP of the final row.
You are basically wrapping the yarn around the rod while working the loops off of your hook. Start by placing your stick on top of your working yarn, wrap it around and then draw through 1 loop. Next, place your hook under the rod, *yarn over and draw through 2 loops*, repeat across alternating your hook between front and back of the rod.
Purchase the ad-free PDF of the pattern on ETSY.
The Pattern:
Instructions are for the FwP the RetP will be the same for each row except when attaching the ring and the rod at the end of the pattern. See stitch tutorial section above.
Foundation / Row 1: Ch 13, draw up a loop in the back bump of each stitch, starting in 2nd ch from hook and across (13)
Rows 2-5: M1, tks x 4, tss3tog, tks x 4, M1, final stitch.
Row 5 RetP: Work as usual until reaching the tss3tog from the previous row, place ring by yarning over through the ring (see stitch tutorial section)
Rows 6-9: M1, tks 4, tss3tog, tks x 4, M1, final stitch.
Row 9 RetP: attach to rod by yarning over, around the ring, for each stitch during the RetP.
Tie off yarn and cut leaving a 20” tail. Tie tail to other end of stick to secure for hanging.
Fringe:
Cut 13 pieces approximately 9-10”
Attach one to the bottom of each stitch of the initial chains.
Fold in half, insert into chain stitch from back to front, pull ends through loop to secure.
Congratulations you are done! Check out my other FREE Tunisian Crochet Patterns