How to Crochet a Men’s Necktie
The following post contains affiliate links. By clicking on the links you are supporting my site and allowing me to continue to create free content. I promise, I only share products that I use and love! For more information please see my disclosure page.
Step by Step how I crocheted an heirloom quality men’s necktie. Using tunisian crochet and hand-dyed fingering weight yarn.
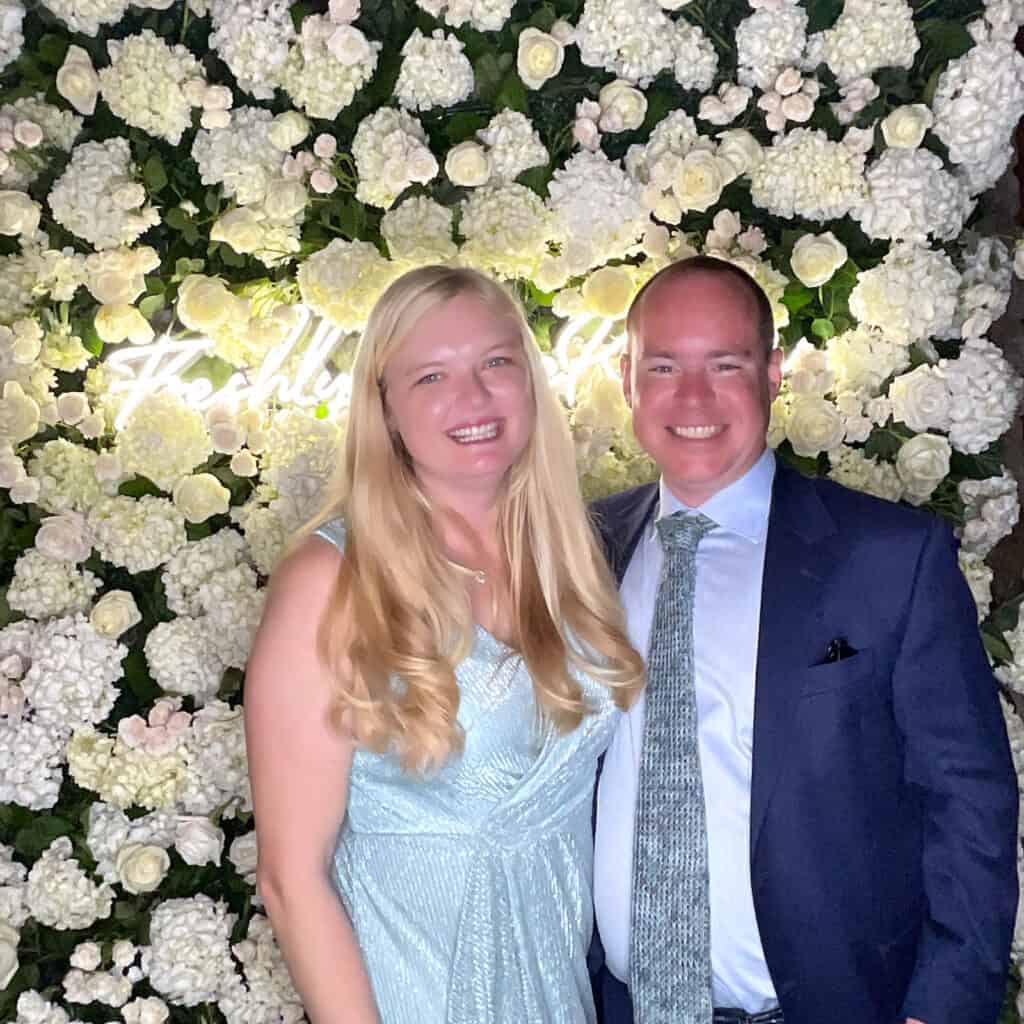
This story starts out like so many others, my husband challenged me to make something custom and unique, a men’s necktie for an upcoming family wedding. At first, I was skeptical and said no because I just wasn’t confident enough to get that nice elegant structure, and to be honest I didn’t want my husband going to this formal wedding with that ‘handmade’ look.
But, I was bitten by the creative bug and could not stop thinking about how I could make it work. So I began my search looking up patterns from other artist but of course my husband didn’t like any of the styles. Leading me to come up with my own designs. Then I began making swatches with different stitches and techniques. Regular corchet just didn’t give that look and knitting would have taken me forever (I struggle knitting fingering weight yarn without hand pain). So I stuck with my tried and true favorite, Tunisian Crochet.
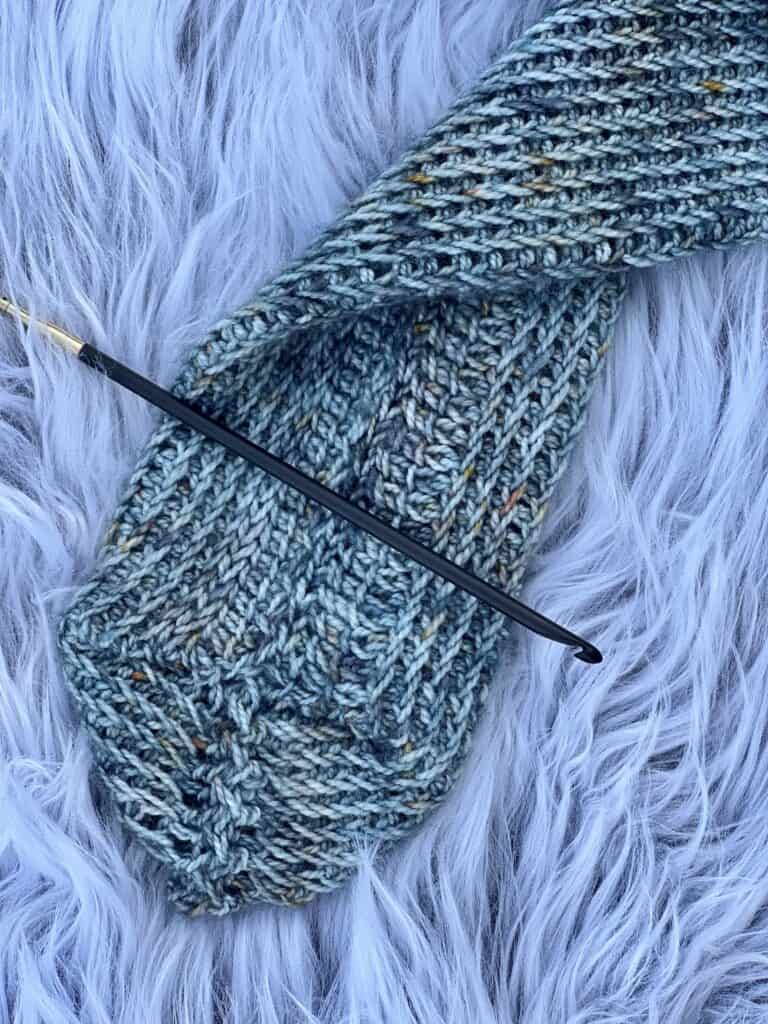
I took a traditional men’s silk tie and studied it endlessly. Then I began trying out different techniques of construction. At first, I thought it would be best to do an initial drastic increase for the bottom point but there simply wasn’t enough structure and it didn’t look good. Then, I decided the best route would be to tunisian crochet a wide panel that I could later, fold and seam down the middle back. This construction technique helped with a lot of my other delimnas in that I could easily hide the decreases and the middle stitches of my panel essentially were the only visible stitches allowing for beautiful consistent tension.
But there was still the concept of shaping, so along, the way I constantly compared my tie to the store bought tie, decreasing in the areas I deemed appropriate.
The Stitches:
I wanted a really smothe and perfect construction for seaming. So I decided to make the first two and last two stitches of each row a tunisian simple stitch and the remaining middle, twisted tunisian simple stitch. Essentially for the entire project you will repeat the following for each row:
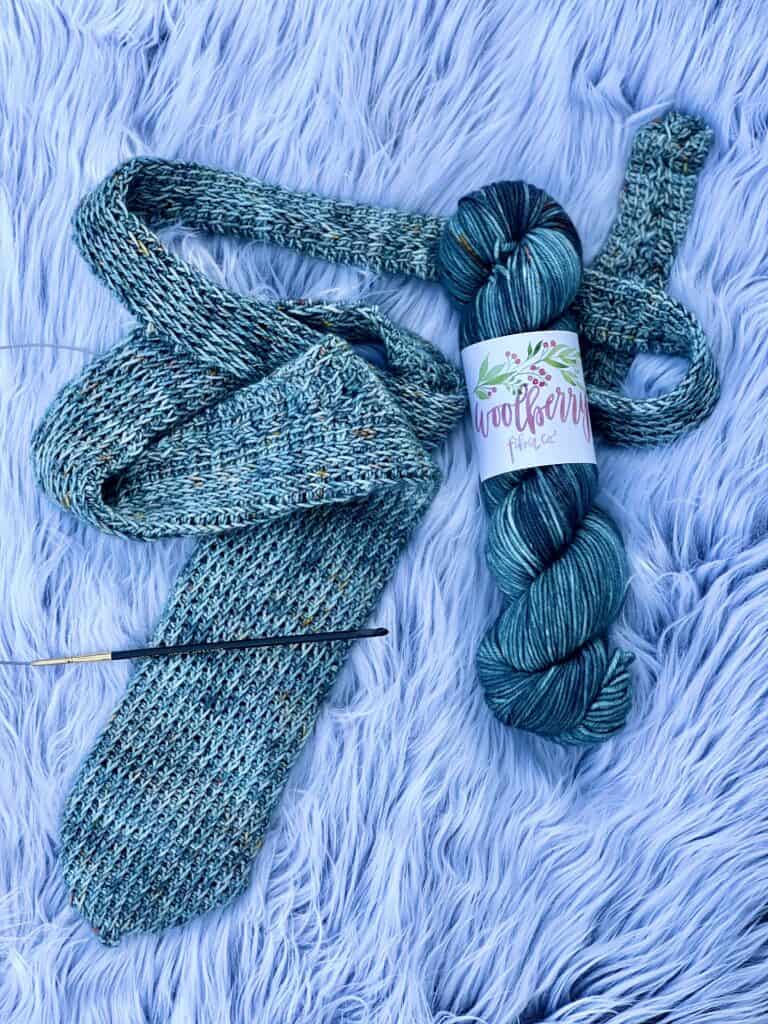
*tss x 2, tunisian twisted knit stitch across, tss x 2, last side st*
The Supplies
fingering weight yarn
Sample Neck tie (to compare along the way)
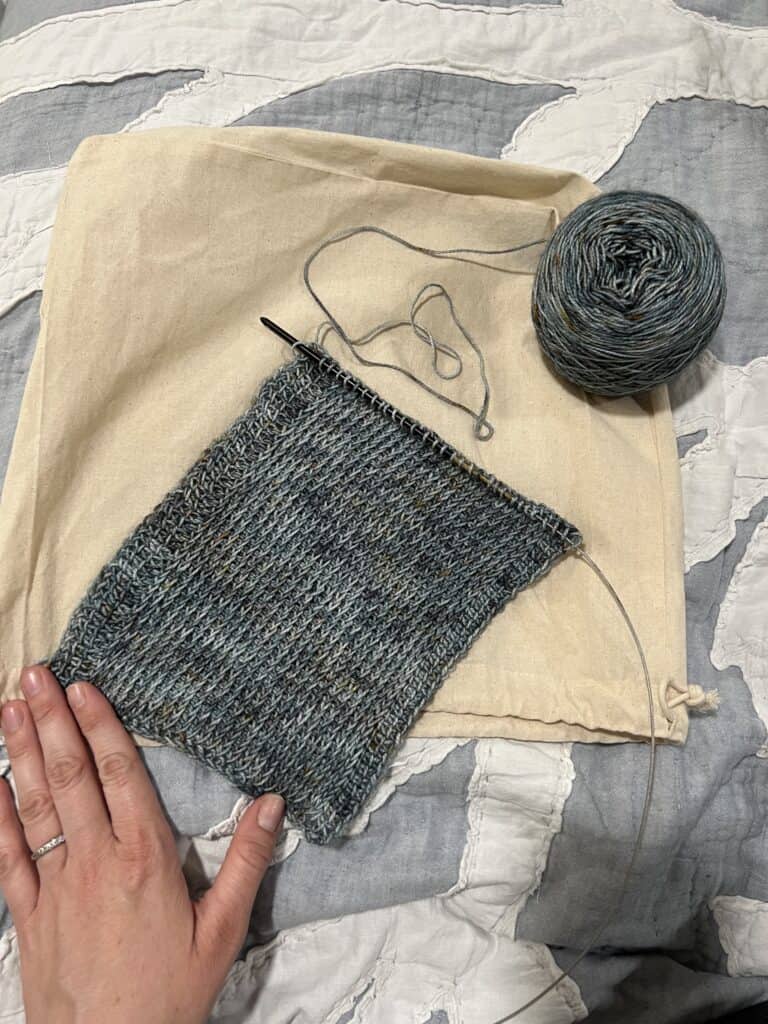
darning needle (I used a really long one and it seemed to go faster!)
The Steps
1. Crochet a rectangular panel that is approximately 8″ wide *tss x 2, twst knit st across, tss x 2*
2. Continue making your panel longer, compare the width to your sample tie and decrease accordingly with the shaping of your sample tie (keep in mind your fiber content and how it may stretch)
3. Stop once you are 10″ shorter than your sample tie. Cut yarn with a generous tail for starting the seaming process.
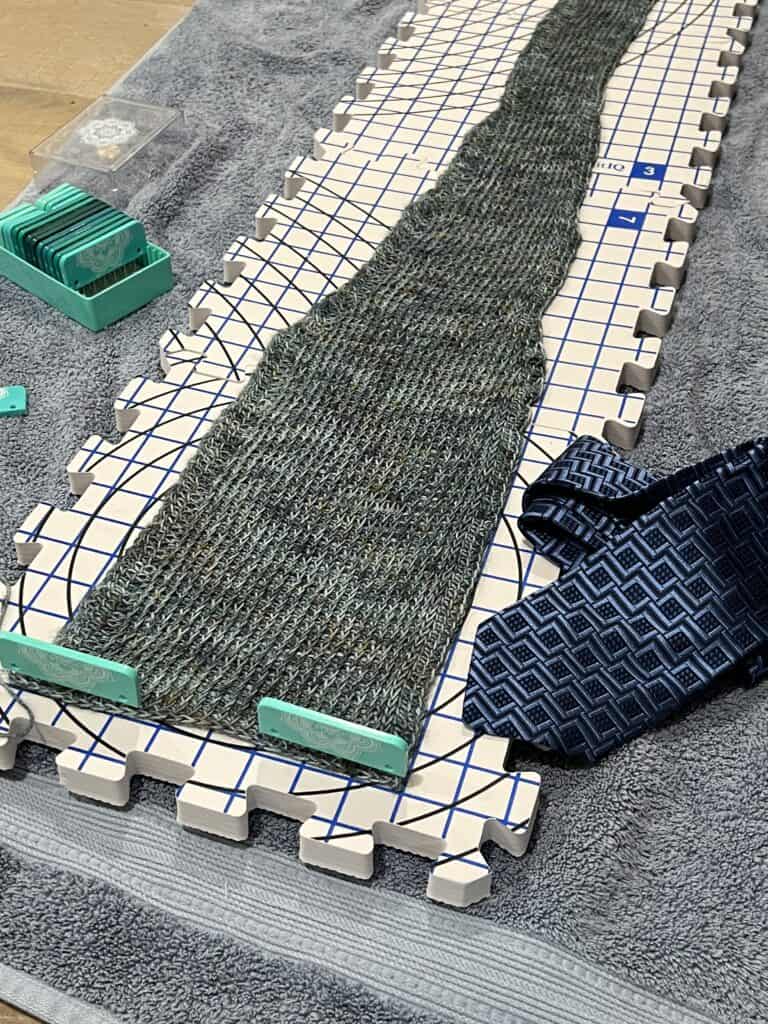
4. Wet Block your Tie. Once you are complete, wet block (soak with a wool wash, dry laying flat, pinning the wider end down perfectly). See photo.
5. Begin seaming. See Below.
Seaming Your Tie
I have a few tips of what I did to hopefully help the process!
After blocking, I folded the tie how I planned it to be seamed (two sides touching, in the middle back and the bottom triangle) and I laid yearbooks across the whole length. This process was very tedious but well worth it! I left it with the heavy weight for probably 24 hours before I began seaming.
Start at the narrow end. Using your tail and a needle, begin seaming the two sides together.
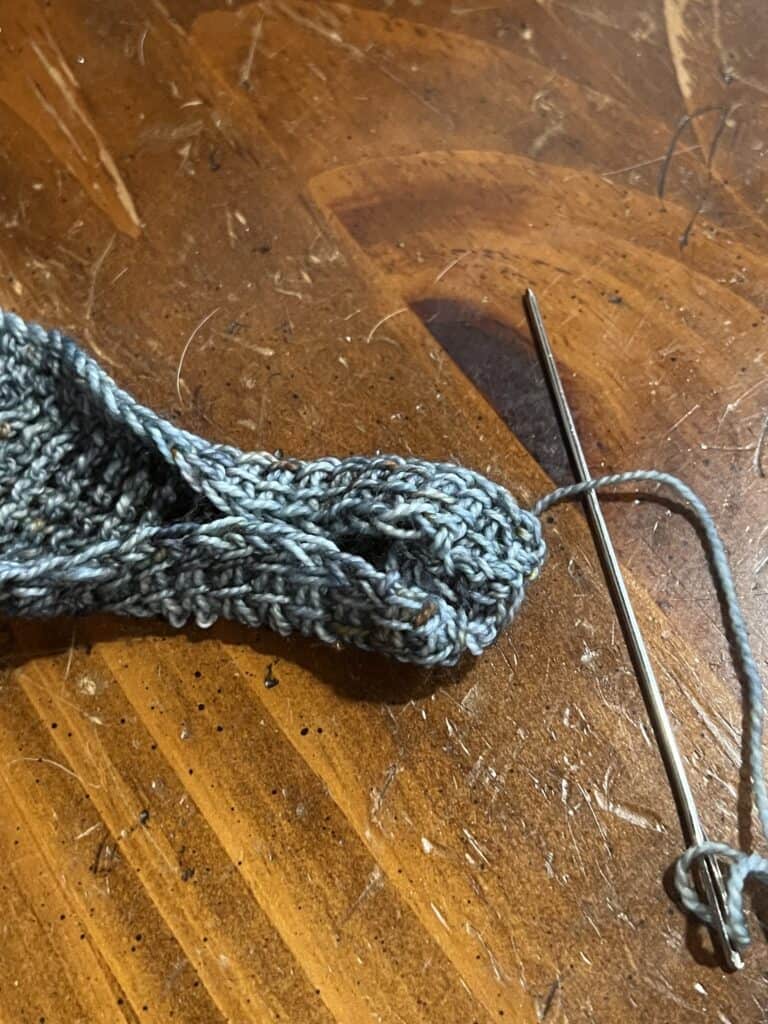
Continue seaming until you reach the wide end. At the bottom of the wide end, go ahead and fold a triangle (think like wrapping a gift) and somehow pin it together if you can (I used sewing clips). Seam the half fold until the triangle and seam the traingle.
What I learned along with way:
- A good swatch would have told me a lot about this project. I regret not making one and washing it so I could check out the stretching. I made my tie probably ten inches shorter than the store bought but it still stretched a lot. It wasn’t a big deal but I should have stitched some sort of holder on the back for the tail to stay hidden. I frequently create this problem for myself because once the design finally clicks in my head, I’m too excited to take the time and swatch.
- Flatten your work along with way. When ever I would sit the project down, I always laid it flat and kept a high school yearbook on top. One of the most important keys to success in this project is ensuring your tie is as flat as possible.
- Blocking is a must!
I hope this project inspired you to create something! Check out my other free crochet patterns.
Learn how to crochet this timeless baby blanket with step by step instructions and YouTube video tutorial.
How I designed and Crocheted a Star Stitch Bag in 3 Hours – Video Tutorial